

For this project I will attempt efficient digital modelling, UV mapping, and preparation for animation/game engines. My plan is to:
· Create a game ready asset that can be used as core building block
· Use programs such as Maya for building poly models,
· Mud Box for high rendering,
· Utilise Crazy Bump for making normal and bump maps,
· And Photoshop for making texturing.
Door Creative Process
For this project I wanted to make a futuristic, industrial door and corridor section that could be used again and again. This is common practise within the games industry as it efficient to make prefabricated sections that can be easily placed and re-textured by the level designers.
I have made a doorway that is game ready, and have taken into account that this door could be potentially used again and again as a prefab. These are the steps that I took to create the door:

Door poly count 1628

Wall poly count 372
I made the door separate from the wall section so that I would have the choices to make sections of corridor without doors attached. Furthermore if I then decide to animate the door it will be in manageable sections to do so without having to change the model structure.
Over all count 2,000
After I made the basic mesh I needed to then UV it so that it could be textured and ready for exporting into other programs like Mud Box. The UVing was not too hard - just time consuming. It was similar to flattening out a very complex cardboard box; I didn’t really have any problems with this

To ensure my door would be game ready, I imported it into Mud Box. Firstly because I wanted to make ambient inclusion, normal maps and high poly renders. Secondly, Mud Box is a very picky program as every face on your model must be in quad so that it can subdivide. So If I was going to have problems this would be one of the first places I would find them.
And problems are what I found - something easy to fix like the odd end gone here and there. However on the wall piece a hidden face got me stuck for a while, as it was perfectly in line with another face which must have been created during an extrusion.
After that problem was fixed I was then able to start work on my textures; my first process was to make a UV snapshot of my UVs 2048 + 2048. I then used the imported Mud Box models to make an ambient inclusion map to use as a base for my textures.

The first thing made was the ambient inclusion map by importing my door model as an OBJ file to Mud Box; as it is not an organic model, I then turned off the smoothing option that occurs during sub-division. After this I added a sub-division of about four or five to achieve a crisp, clean look so that I could incorporate as much detail into my ambient inclusion map as possible. To achieve this, I went into the mapping options in Mud Box and made sure it was the same size as my UV map and that it was saved as a .tga at best quality.
After this I could then bring it into Photoshop to overlay it upon my textures using the multiply layer setting to create a sense of depth and realism, and attenuation of light due to occlusion. During this process I would regularly save the file as a .tga in my textures folder within my Maya project file, and in turn checking how it looked on the 3d model in Maya.


My next step was to make my normal maps. I have achieved this by loading my model into Mud Box to add high-poly detail to the areas that have, for example, features such as nuts and bolts, or scratches and dents. Once I had finished this process I then made my normal map from this model. I would then go into the ‘extract texture map’ options in order to select ‘normal map’ – for the extraction options I needed to target the low resolution mesh, and then to select the high resolution map for the next target. Typically Mud Box will automatically do this if your model is selected; if not it is necessary to select the highest and lowest point in the subdivision level manually. Ultimately the only other step in this process is to ensure the normal map is the same size as the UV textures.

Now, with my normal map applied to my low-poly model, I achieved very similar quality in my renders – as if it was a high-poly model. This makes it more economical for use in a game engine, as it does not take up much space by wasting polys.
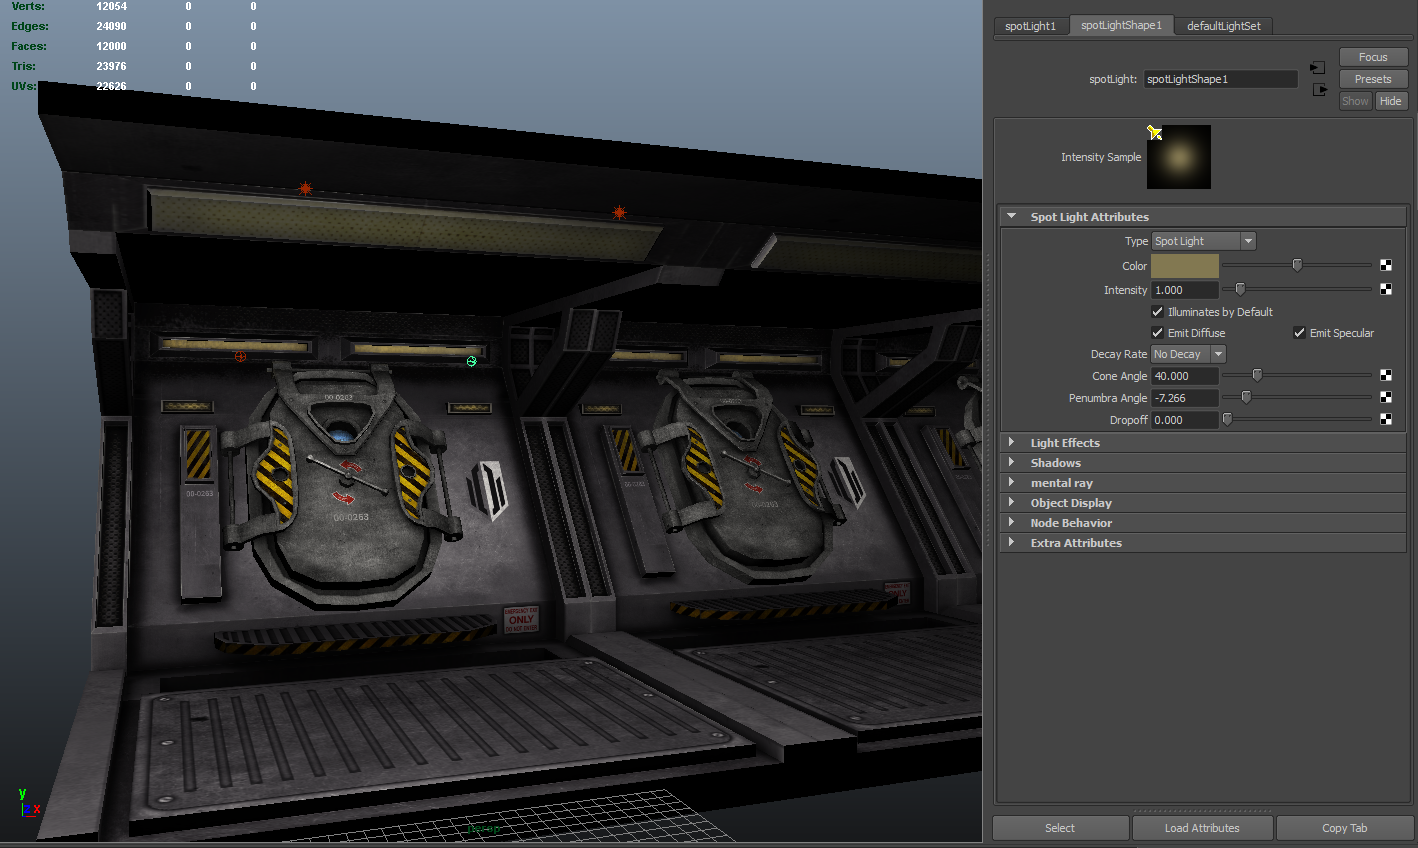
For this last step I added light into my scene so as to give it a more realistic render quality. To achieve this I used two spotlights for the main lighting, and two point lights to support the overall brightness. There were potentially other ways to introduce light into my scene – I could have had light emitting from my textures e.g. from features such as windows or lights, but I chose not to as I preferred the overall effect of using the spotlights as opposed to relying on map-specific details for lighting.
Overall this model can be textured and re-used repeatedly for different purposes depending on the environment it is placed into; ultimately this is a task for the creative direction of the hypothetical game it is being used for. For example the door has numbers on its texture so you can make alternate textures if needed

That’s the low poly door sorted; I imported the model into mud box so that I could make my high renders, as the lighting could not be imported as well. So I took the opportunity to use secular maps to introduce light into my scene – I have the light emitting from my textures.

I was also able to add more detail with the bump map textures in mud box, overall just polishing off my textures ready for the turntable animation.


These are the poly counts for my model:
- Door poly count: 1628
- Wall poly count: 372
- Over all count 2,000
Bibliography:
Used as reference during April and May 2011.
· 3D games textures second edition, book by Luke Ahearn